The Art of VFX: John Carter
The Art of VFX settles down with Sue Rowe, VFX Supervisor at Cinesite, to discuss work on John Carter.
How was the collaboration with director Andrew Stanton?
It was a very open collaboration. I was onset with Andrew and his team in UK studios and in Utah and back at facility we would have daily video calls with him to discuss shots. I have to say that I’ve never worked with a director who was so hands-on when it comes to the visual effects, he was great to work with.
What was his approach about the VFX for his first live action movie?
He wanted to be very involved in all the creative decisions, and onset he was very involved in direction of the VFX. I thought his approach to his first live action film was brilliant, he’s a top director and I enjoyed every minute of being on set with him and his team.
Can you tell us what you have done on this show?
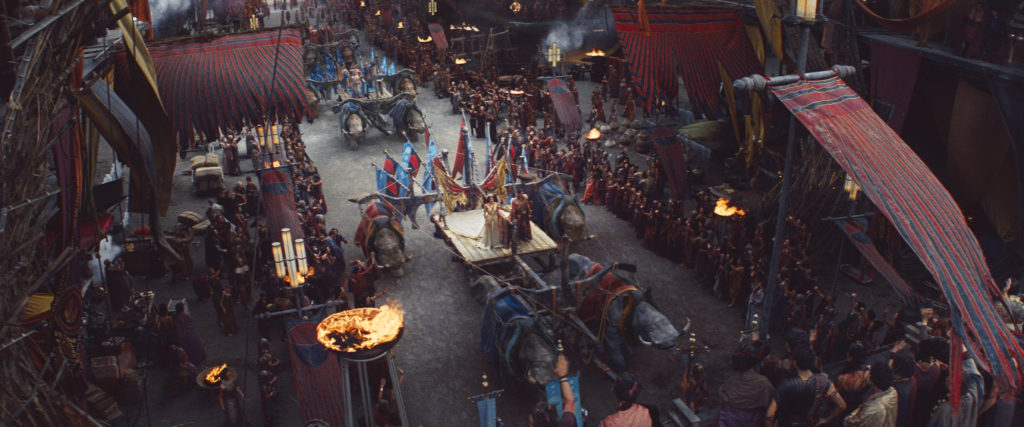
Cinesite created the majority of the film’s environments, including the opposing cities of Zodanga and Helium, and the Thern Sanctuary, as well as a big air battle and full-screen CG digi-doubles of John Carter and Princess Dejah. The environments were populated with CG crowds and hundreds of CG props.
John Carter is the biggest project in Cinesite history. Can you explain to us how you faced it and what were the major changes at Cinesite for it?
Yes, it’s fair to say that John Carter is our biggest and most complex project to date. One of the major challenges we faced was the sheer volume of shots and of course the rendering. The shots were so complex that if we’d rendered them after every small adjustment they would have literally taken months to render! So we had to be smart about how we rendered and keep a flow of communications between the teams so weren’t all sending the shots off to the render farm at the same time.
How did you split the sequences amongst the different supervisors?
Due to the volume and complexity of the work we divided the shots between four additional visual effects supervisors. Jon Neill and his team worked on the travelling city of Zodanga. Christian Irles oversaw the team that created Princess Dejah’s city, Helium. Ben Shepherd supervised the huge aerial battle between Zodanga and Helium and Simon Stanley-Clamp led our work on Thern. Artemis Oikonomopoulou was our overall 3D supervisor. These leads guided a team of over 400 talented artists.
The film opens with an impressive long shot. Can you tell us in details its creation?
This is the minute-long fully-CG opening sequence of the film starting with a view of Mars from space, with the camera travelling through clouds to the surface of Mars and along a giant trail pitted with mining holes. The camera pans up to reveal a monstrous dark city marching along the planet’s surface – the city state of Zodanga – mercilessly consuming the planet’s resources. The camera travels through the enormous mechanical legs of the city and upwards to reveal the airfield deck and palace as an enormous flying machine takes off and whooshes past the camera.
We shot Aerial footage of the Utah desert from a helicopter. The path of the camera pre-vised based on GPS maps and Google Earth. We prepped when to shoot to get the best lighting but the speed of the real camera was too slow for the Power of Ten idea. So we remapped the live action plate on to geometry which gave us greater freedom for the camera move. Jon Neill and layout artist Thomas Mueller designed the shot starting in space, through CG clouds to the surface of Mars, ending with the camera rising up between the city’s moving legs.
From there we rise up to the airfield deck where one of the ships is taking off. We worked in layout to establish the camera move and general animation timings, before working on placement of key objects like major flags, leg animation and finessing ship animation. Dressing layout such as ships and props was then added.
For the wider part of the shot, the ground was created using the photogrammetry environment combined with a digital matte painting projected in Nuke. Then as the camera travels closer, the ground had to be fully 3D CG, including the giant trail and holes where the city has been mining. Rendering this shot was very challenging. Layout had to animate the LOD throughout the shot and hide objects when they were occluded.
A lot of effects elements were created using Houdini and Maya fluids for the sequence including a cloud element when the camera flies through the atmosphere, leg impact effects, a buffalo trail type fluid effect to give the impression of residual dust, and separate flag simulations for large-scale flags versus ships flags.
One important and impressive fight is when John Carter fights against the Zodanga soldiers in the air. Can you tell us more about how you prepare and shoot this sequence?
This involved multiple CG airships in a chase sequence with cannon fire. It required interior green screen composites with CG ship deck extensions, CG wings for ships and digital matte painting backgrounds. An exterior sword fight sequence with a full CG Thark city combined with digital matte paintings re-projected over geometry to create terrain and the mountainous landscape of Mars. This also involved Thern effect shots including a Thern beam, gun, and cannon, as well as destruction of Thern, and Thern as a destructive force.
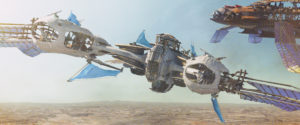
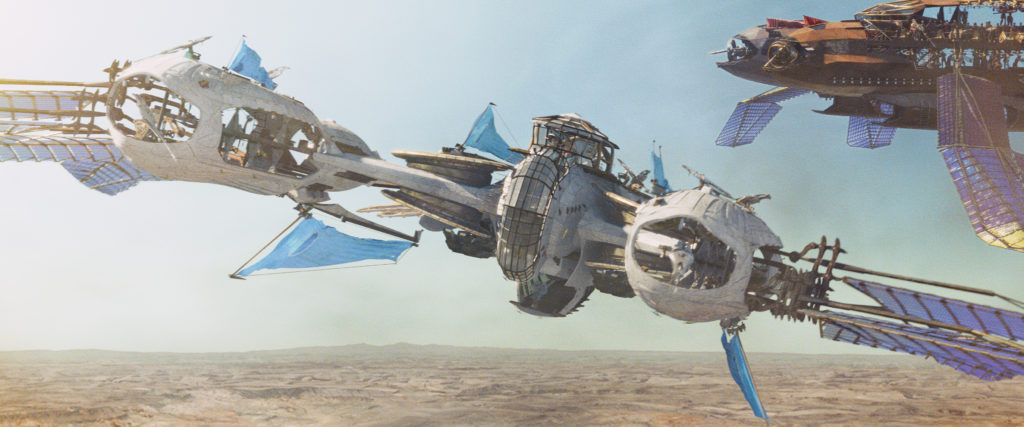
For both sequences, the giant airships also entailed creating models which could be seen in close proximity with a high level of detail as well as be used for wider shots. A challenge for look development was that they were required to be more like a 19th Century sailing ship, contemporary with the time of the film’s setting, than the type of spaceship which a modern-day audience might expect.
For Sab’s flagship corsair, a partial set was created for the bridge/cockpit and one deck of a single ship. This was LIDAR scanned and photographed for reference and recreated. The remaining areas were created as full CG models. Dejah’s ship and the flagship Helium ship, the Xavarian, were created in 3D also. Each ship had a full set of wings which were sized and laid out specifically for each ship. These were controlled by pulleys and ratchet-type controls to give a sailing look. Each of the wings was covered in hundreds of individual solar tiles which needed to be able to be controlled in animation.
How did you design and create the Thern effects?
The sequence starts with Carter and Dejah on a river boat, approaching the Thern Pyramid. Carter uses his Earth strength to leap hundreds of feet up in the air, carrying Dejah. They land on the surface of the pyramid itself. This part of the sequence was shared with Double Negative who produced the external view of the pyramid, mountains and river. Cinesite produced the pyramid activation effect. As soon as Carter and Dejah land, the surface of the pyramid starts to transform, with Thern (a living nano-technology matrix), glowing and growing beneath their feet, before running off across the flat surface of the pyramid in a Thern wave. As this happens, the surface breaks into sections of steps, which drop down. Carter and Dejah move forward to a blank wall which transforms as a Thern tunnel forms in it. A handful of wide shots in this sequence required Carter and Dejah digi-doubles, which were hand animated.
The Thern technology was implemented as an advanced Houdini simulation, augmented by a considerable amount of custom software. Initially a model is generated of the required gross shape, and then a ‘scaffold’ pass is generated. From this pass, the Thern itself is ‘grown’ onto the matrix, before it is procedurally animated. Lastly the animated geometry is handed off to lighting where the required passes (including custom glow and internal light passes) are rendered for compositing.
As Carter and Dejah moved into the tunnel, it’s seen to be building around them, leading them deeper into the pyramid itself. These ‘growing Thern’ shots are some of the most complex we undertook, with detailed close-up views of the Thern growing and building the fabric of the tunnel.
As the tunnel itself ends, the main Thern Sanctuary room is seen to build itself, opening out within the Thern matrix of the pyramid interior. This shot required extensive Thern simulation and growing effects, blending multiple elements together in Nuke to build the shot up.
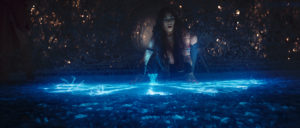 Once in the Sanctuary itself, Dejah puts the medallion on the floor, which ‘activates’ the Ninth Ray effects sequence. Carter and Dejah were shot on partial green screen, but standing on a self-illuminated white floor. The intent was for the floor to trigger lighting effects to match the desired Sanctuary illumination, but it required extensive rotoscope work to extract the lower parts of their bodies. When the Sanctuary is activated, nine fingers of Thern run across the floor. This required detailed Thern to be grown and animated to resolve the Thern fingers growing.
Once the animating Thern pattern is established on the floor, Carter and Dejah discuss the significance of the markings before a set of Thern writing reveals itself to them. The Thern writing was generated by using a Thern alphabet provided by production as a reference. The individual letters were modelled in Maya, before having Thern grown and animated onto them for the reveal effect.
All shots in the Sanctuary sequence had detailed camera tracks completed in 3DE, and a geometric Sanctuary layout was constructed using a green-screen LIDAR scan so Simon Stanley-Clamp and his team were able to determine exactly what part of the Sanctuary should be seen in any given camera direction.
Once Carter and Dejah have established they need to revisit Helium city, a noise from outside startles them and they leave. Carter grabs the medallion on the way out, which causes the ninth ray effects to shut down. This was achieved using a Thern animation pass which reverse mirrors the growing effect seen earlier in the scene.
As Carter and Dejah run outside, we return to a shared scene with Double Negative, with Cinesite again providing the steps built into the Thern pyramid model provided to us. A wide shot shows Carter and Dejah running out of the Thern tunnel as CG digidoubles before a cut to a close-up shot showing a green screen Carter and Dejah running across a fully digital pyramid environment. This last shot is a seamless transition between Cinesite (at the head) and Double Negative (at the tail).
The entire Thern effect system was designed and built from scratch using a combination of Maya, Houdini and custom software developed in house. Based on the principles of nanotechnology, the system provided a semi-automated way to ‘grow’ Thern into any environment and geometry. It took a full year of development time to evolve and bring to the big screen.
Can you tell us in detail the creation of the impressive city of Zodanga?
Zodanga city was based on an overall design concept by Ryan Church from the production’s art department. Jon Neill’s team had to interpret and build detail into the design to make it work for full-screen backgrounds. One of the technical challenges was making a full-size city for wide shots and also detailed areas to be seen in close ups.
There was a huge amount of work done on shader resource files, per frame asset visibility and prman XML stats analysis. This was what made it possible for us to render the city at all.
A handful of sets were built which were locations within the city, but these needed considerable extension work to give depth and scale to the city. Thousands of pieces of geometry were modeled for the city buildings. To dress the virtual locations, hundreds of props were also modeled, from tables, tents and cables to lamps, bottles and cases.
One of the major challenges of Zodanga is that it’s a city on legs – we had to work through how the legs would look and move, and how the city would be mounted on them. The design of the legs, scale, materials and rigging had to match the time period of the story, while the surfaces and weathering had to make it look like they’d seen years of service on the Mars landscape.
It wouldn’t have been practical to animate 674 legs individually, so we used lots of timed animation caches. Variations in movement and secondary animation such as cogs and cabling were used to create interest in the leg movement.
It would also have been impractical to texture all sections of the city in great detail, so decisions were made about which sections of the city would be seen close up. These included the Hangar Deck, the Airfield Deck, the Zodangan Streets, and the Palace and Towers. Different levels of detail were established for these scenes. The textures, surfaces and edges were detailed to give a dirty, industrial feel using a combination of Photoshop, Mari and Mudbox in tandem with bespoke shaders and lighting development.
Did you create previs for the Flyer Chase sequence to help the shooting?
We did a technical previs for the shot, but the majority of previs on the film was done by a company called Halon. Tech previs is the next stage. We take into account the real Stage dimensions and actual locations and recreate the previs using these restrictions. It allows us to confidently advise the camera crews on the angles we need to shoot to cover the VFX work in post. Often the actors and camera crews are in 360 degrees of green. We need to provide visuals to them so they can see what the audiences will see later down the line.
Some shots of this chase sequence involved an impressive number of elements especially for the second part with the huge environment, Zodanga and all the dust. Can you explain to us the creation for one of those shot?
This was the first sequence we did on Zodanga. The challenge was how to render the large amount of props and set pieces used to dress the digital set. The scenes used a large amount of geometry which is very memory heavy. We used Cinesite’s proprietary geometry format called MeshCache for the geometry. MeshCache supports LOD files and between layout and lighting departments we managed to use mid and low-res models in the distance and high-res models in the foreground. The challenge was to make the shot as good and complex as possible while still fitting it into memory.
Since Zodanga is a very boxy, utilitarian-looking city we needed to break up a lot of the straight edges to show wear and tear on the concrete. This was done by modelling and texturing using Mudbox as well as other techniques.
Lighting of the hangar deck posed another challenge. We constructed large parts of the frame in CG (or the whole frame for fully-CG environment shots), so we had to try to mimic how real world lighting works. This was achieved using global illumination, a technique to calculate how light bounces around in the scene. This gave our shots a very natural look. We would normally start of by using only one light (the sun), then calculate the global illumination. But in a lot of shots we needed to add extra lights to meet the art direction from the VFX supervisor. A God-ray pass was done using a volumetric shader to add more atmosphere and help sell the sunny and dusty environment.
Compositing used a template script in Nuke as a starting point for every shot. This was populated by around 60 layers to give compositing a very granular control to be able to tweak the lighting in Nuke.
In addition to the city backgrounds we had to add CG wings to the practical flyer that John Carter escapes on. The wings are made from a shiny, iridescent material. We provided the director with a few test shots using different settings. The wings had to be carefully lit in every shot to bring out the rich gold and purple tones we were looking for. The wing shader changed the color based on the angle between the wings and the camera and we could control the colours and the blending between them in real time in Maya using a CG shader.
For action shots, in addition to the wings, we also did a number of shots where the flyers are fully CG with digi-doubles riding them. The digi-doubles used subsurface scattering and our Cinesite skin shader. We also simulated movement for John Carter’s clothes and hair.
Later in the sequence we reach the city’s legs and a breathtaking chase takes place. The amount of geometry per leg was very challenging and in some shots we see hundreds of them. We also go from an inside environment (the hangar deck) to an outside environment so we had to change our lighting setup somewhat.
We also had to layout the impact effects when the legs hit the ground. An impact effect element was provided by the effects department as well as a layout that would analyse the movement of the leg and place the particle and fluid effects at the exact position of the ground impact. We also did quite a lot of manual effects layout to make the shots more dynamic and dusty. The legs effect was rendered in several layers, to deal with the scene complexity and give compositing more control.
Can you tell us more about the creation of Helium?
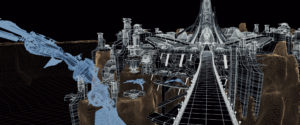
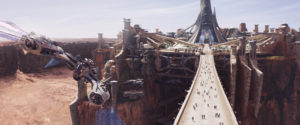
Our models of Helium City were inspired by the art department concept stills. This was easy enough to do in matte painting but very time-consuming and render heavy to get actual full 3D renders. Photogrammetry Projections were created for the terrain based on the High res stills we took on location in Utah. These were then worked up in matte painting to achieve the effect that it could almost be a real environment but with a hint of Martian.
The shots presented the city as a whole with both Helium Major and Helium Minor visible, amount of texture maps and shaders. Render time was very high for these shots and all layers, such as crowds, terrain, etc were rendered separately.
Due to the sheer volume of assets needed for John Carter, we had to develop a proprietary hierarchical caching system. This allowed us to group and duplicate individual models within larger structures and being able to work more efficiently in terms of time and file sizes. For example a prop box would be cached as one asset, then the duplication and positioning of that asset would be cached as part of a city’s props, then that in turn as part of the larger city group along with buildings, etc.
The difficult part was accessing each different stage of this hierarchy, which was possible to do through various filtering options. Each asset also had its own lighting and shading file which would be easily adjustable even from the top node of the hierarchy. We also developed level of detail files for modelling and texturing which could be manually adjusted or calculated automatically through a shot camera.
What was the real size of the Helium sets for the final battle and how did you extend them?
This sequence was held in the Palace of Light, which is in Helium City. The real size of the set was only 30ft high extended 150ft on the ground. The 3D model of the palace needed to be able to be viewed from the exterior as full CG and also used as a set extension for live-action shot on an interior set. It was a cathedral-like structure with solid vertical ribs supporting glass ‘feather’ wall panels – with mirrors and a lens mounted at the top of the structure. This needed to have the small amount of set translated and extended hundreds of feet.
Since the glass needed to be transparent, the exterior environment also needed to be rendered in the scene, along with reflections and refractions of CG and the live action. The interior was a night scene, lit with hundreds of flambeaux and moonlight. The complexity of the model, textures, shaders and look of the glass was quite a challenge. This was also combined with a ship crashing through the glass walls, so we built some panels with additional geometry which would work better for shattering in effects.
The glass itself was also a huge challenge. It needed to look like the frosty glass that had been on set inside the palace, while also keeping the palace looking beautiful. This took a lot of time and many tests. Raytracing glass is traditionally computationally expensive. We knew we would need to be smart about how we rendered these shots but still make sure they did the design justice. Nikos Gatos and his team decided to find a more efficient way to render the 300 shots in the final battle sequence. They cherry picked the hero shots and ray-traced them, but the other shots were pre-cached, then ray-traced, into various point clouds.
How did you create the soldiers for the battle between the two armies?
Both the city of Helium and Zodanga are populated by red skinned humans. When aggressors Zodanga storm Helium we needed an army of 50,000 to populate the outskirts of the city! In every shot if you look closely you will see all manner of human life, from soldiers to civilians, men, women and children. Jane Rotolo, our Massive TD, supervised the mo-cap shoots with the on-set stunt team and built Cinesite a library of moves. In some cases the actions were so believable we were able to add crowds to scenes that we would previously have not been able to do! In one case we replaced real actors as they looked like they were props!
The people in the cities were derived from a few basic characters on set. We photographed about 8 hero Zodangan, 8 hero Heliumites and then our texture team mix and match the clothes and the heads to great the diversity needed for the crowd shots. Each of the air ships had a crew of about 70 so these were all textured and motion captured with specific actions suitable for the environment.
How was the collaboration between the different vendors?
Because we were responsible for the majority of the environmental shots we shared a lot of assets with Double Negative, and a few with MPC. We had a great relationship with them and when you’re sharing shots you have to have that element of trust with your neighbours. Even though we’re technically competitors we all work together to get the job done. The production managers on both sides did an amazing job at planning and managing the assets being moved between each facility. It was a huge task and my hat goes off to them for making it work so smoothly.
Can you tell us more about the stereo conversion process?
Scott Willman was our stereo visual effects supervisor. For the stereo conversion of John Carter, we built an all-new pipeline from the ground up. We’d never done a 3D conversion film before and we saw this ‘clean slate’ as a great opportunity to really try something new.
The conversion technique in popular use involves separating layers using roto and then pushing or pulling them to certain depths by grading a depth map. Once this is in place, a series of filters are used to simulate the shape and internal dimension of an object. We believed this prevents artists from quickly achieving correct spatial relationships and natural dimension in their scenes.
To overcome this limitation, we decided that instead of manually placing objects in space, it made more sense to use animated geometry that we could track and position in the scene and render through virtual stereo cameras. This allowed us to ensure that if John Carter was running from the foreground to the background he appropriately diminished in scale and that his footfalls were always meeting the ground. Elements that he ran pass would also be at an appropriate scale relative to him. It allowed us to place all of the objects in the set in their proper location in 3D space so that correct scale perception was maintained.
By having the scene laid out in 3D space, ‘shooting’ it also became very natural. We could use the same cameras, lens data, and animation from the actual set. When we then dialed our stereo interaxial distance (the distance between the cameras) it was in measurements that made sense to the scale of the physical set.
Another major benefit from using the tracked VFX cameras was that we were able to render CG layers in stereo and have them fit seamlessly into the converted plate elements. This was particularly important when Carter physically interacts with four-armed Tharks. In typical 2D visual effects, holdouts would suffice. But in 3D, the position of each CG limb must be correctly placed in depth relative to the converted plate element.
What was the biggest challenge on this project and how did you achieve it?
The biggest challenge was simply the variety of work that we needed to do. We split the film into four main sequences with their own VFX supervisor, each supervisor then had to feedback from me before we showed it to the director. This kept it consistent and manageable. The other issue was how much work was shared between the vendors; we supplied over 400 backgrounds to Dneg for example. This in itself was a logistics challenge. We had an army of brilliant producers and coordinators who made sure that communication was efficient and open. Its one of the strengths of working in London, all the big houses are within walking distance of each other so we meet and discuss what we need informally too.
Was there a shot or a sequence that prevented you from sleep?
Yes, too many. With 800 shots to final it becomes a juggling act. But I had a great team of producers and coordinators so I always had support from my producers, I never felt that I was on my own, my team ‘had my back’ all the way through the shoot and the post.
What do you keep from this experience?
I learned a lot on this film, which is the only reason I stuck at it every day. I felt honoured to be surrounded by artists of this calibre. From the on set data wranglers to the MD everyone shared the same goal to make this movie be as good as it could – Andrew Stanton’s enthusiasm is infectious you know! I also saw some incredible sights in Utah, what a memories. I love to travel and if you can combine that with filming it’s an awesome road.
How long have you worked on this film?
I was on the film for about two and a half years, it was a labour of love. If Andrew Stanton picked up the phone and said lets do it all again I would be there like a shot, and in this industry loyalty like that speaks volumes.
How many shots have you done?
We created 831 visual effects shots for the final film and converted 87 minutes into 3D.
What was the size of your team?
At the height of the project we had 400 artists working on it.
